Fava is a very nice user interface for Beancount, a Python-based Plain Text Accounting system. This means that every account, every transaction, every price update is stored completely in plain text, in a custom DSL (based off Ledger, another Plain Text Accounting system).
I absolutely love it, and have been using it on and off for around 4 years to manage my personal finances. However, NixOS doesn’t have a module for it (even though it’s packaged), so we need to take matters into our own hands! Additionally, I want it to be available anywhere there’s internet, but without having to expose my computers to the internet directly.
While this article is using Fava as an example, everything here should be more or less applicable to any other application you wish to expose.
Let’s go through this step-by-step, each step iterating on the last, and adding some sort of functionality.
Step 1: Just run it from the command line
This is how Fava is meant to be used. You store some Beancount ledger files somewhere, and then point fava at it, do whatever you need, and close it when you’re done.
Something like this:
;; ------------------------------------ Options
option "operating_currency" "EUR"

;; ------------------------------------ Account declarations
2024-03-01 open Assets:Cash EUR
2024-03-01 open Equity:Opening-Balances EUR
2024-03-01 open Expenses:Train EUR

;; ------------------------------------ Transactions
2024-03-01 * "Initial balances"
  Assets:Cash                                          10.00 EUR
  Equity:Opening-Balances

2024-03-01 * "Buy train ticket"
  Expenses:Train                                       10.00 EUR
  Assets:Cash
Using it the “traditional” way, we’d do queries and operations using the Beancount CLI:
$ bean-report journal.beancount bal
Assets:Cash
Equity:Opening-Balances  -10.00 EUR
Expenses:Train            10.00 EUR
Income
Liabilities
And add transactions manually to the journal file.
Now, let’s check out fava:
$ fava journal.beancount
Starting Fava on http://127.0.0.1:5000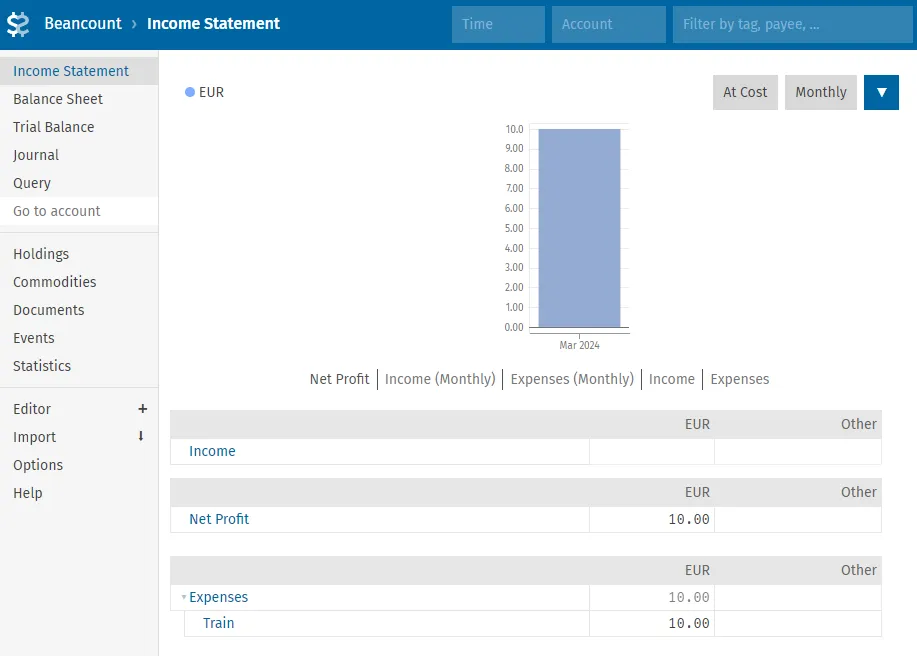
We get a nice web UI showing our transactions and balances in an understandable manner, much easier to use than having to remember all the command-line commands!
However, having to run it from the command line manually means that there’s still a lot of friction to using it, since we have to explicitly start it and it’s not continuously available.
Step 2: systemd service
So now let’s go one step ahead, and start leveraging NixOS to keep Fava running in the background at all times by creating a systemd service.
{ pkgs, ... }:
let
  ledgerFile = "/var/lib/fava/ledger.beancount";
in
{
  systemd.services.fava = {
    description = "Fava";
    after = [ "network-online.target" ];
    wants = [ "network-online.target" ];
    wantedBy = [ "multi-user.target" ];
    serviceConfig = {
      ExecStart = "${pkgs.fava}/bin/fava ${ledgerFile}";
      Type = "simple";
      User = "fava";
      Group = "fava";
      Restart = "on-failure";
      RestartSec = "5s";
      NoNewPrivileges = true;
      PrivateHome = true;
      PrivateTmp = true;
      PrivateDevices = true;
      ProtectHome = true;
      ProtectSystem = "full";
      ReadWriteDirectories = "/var/lib/fava";
    };
  };

  users.users.fava = {
    home = "/var/lib/fava";
    createHome = true;
    isSystemUser = true;
    group = "fava";
  };

  users.groups.fava = { };
}
Now we just need to create that file (sudo -u fava touch /var/lib/fava/ledger.beancount) and we can access beancount at any time by just going to http://127.0.0.1:5000.
Opinions on systemdI know a lot, and I mean a lot of people hate systemd, but I think it really shines in NixOS. The declarative unit files are a perfect fit for the declarative nature of NixOS, and the virtual targets such as
network-onlineandmulti-user, not to mention things like drive mounts, make configuring something on NixOS using systemd a considerably nicer experience than if it were something elseThis is without even getting into the sandboxing! The above config means that the fava service can only access its own directories, and nothing else.
Step 3: Exposing it with Cloudflare tunnels
Cloudflare tunnels are an immensely useful feature Cloudflare provides for free which allows you to expose any locally running service to the internet without having to do any type of port forwarding — perfect if you’re running Fava from a home server, since you’ll never be directly exposed to the internet!
Thankfully, NixOS provides a module to configure tunnels, so we can keep everything reproducible.
Step 3.1: Creating the tunnel
First, we need to create a tunnel using the cloudflared tool. We’re only going to need it for this step, so we can just run it inside a Nix shell:
$ nix shell 'nixpkgs#cloudflared'Now we can log in to Cloudflare:
$ cloudflared tunnel loginThis will open a login page, where we can select the domain we want to associate with this tunnel. After authorizing, we can create the tunnel:
$ cloudflared tunnel create fava-tunnel # give this the name you wantIt should give you a message somewhat like this:
Tunnel credentials written to /home/pta2002/.cloudflared/8da009ab-2e12-4c38-987a-33faee9eb692.json. cloudflared chose this file based on where your origin certificate was found. Keep this file secret. To revoke these credentials, delete the tunnel.

Created tunnel fava-tunnel with id 8da009ab-2e12-4c38-987a-33faee9eb692
Take note of that UUID - you’ll need it! Copy the credentials file to the same directory as the nix files, since you’ll need to access it from Nix:
$ cp ~/.cloudflared/[your tunnel id].json credentials.jsonThe last step is configuring DNS to route traffic to our tunnel:
$ cloudflared tunnel route fava-tunnel fava.[your domain]Using a wildcardIf you intend to expose more services from this machine, you can use a wildcard domain so that you can skip this step later. Just point the
*.[your domain]record instead!
Step 3.2: Configuring cloudflared with NixOS
Now, we could just expose the fava service manually through the command line, but this is NixOS, where’s the fun in that? Let’s use the NixOS module:
{
  # ...

  services.cloudflared = {
    enable = true;
    tunnels."[your tunnel id]" = {
      credentialsFile = "${./credentials.json}"; # This will be changed later
      default = "http_status:404";
      ingress."fava.[your domain]".service = "http://localhost:5000";
    };
  };
}
The key part is the ingress setting. This is saying that any access to fava.[your domain] will actually point to http://localhost:5000 - that’s Fava!
Step 4: Authentication
This is great, you can now access Fava from anywhere in the world! Unfortunately, so can anyone else, so we really need to add some authentication. The easiest way to do this, by far, is with HTTP basic authentication.
Unfortunately, Fava has no built-in support for HTTP authentication, but we can easily put a proxy in front of it. We’ll be using nginx for this, since the NixOS module is excellent.
The first step will be creating the file which stores the user credentials. This can be done by running the htpasswd command, from the apacheHttpd package:
$ nix shell 'nixpkgs#apacheHttpd'
$ htpasswd -c http_auth [username]
It’ll then prompt you for a password, which will get encrypted and stored in the http_auth file. Now, we can configure nginx via NixOS to point to it:
{
  # Change the port the tunnel points to to match nginx's
  services.cloudflared.ingress."fava.[your domain]".service = "http://localhost:80";

  services.nginx = {
    enable = true;
    virtualHosts."fava.[yourdomain]" = {
      forceSSL = false;
      enableACME = false;

      locations."/".proxyPass = "http://localhost:5000";
      locations."/".basicAuthFile = "${./http_auth}";
    };
  };
}
Note that we changed the cloudflared ingress rule to point to port 80, since that’s where nginx will be running.
Step 5: Encrypt credential files
The current configuration will already work incredibly well, and is in fact perfectly usable if your config will never be looked at by someone else.
However, there are actually two sensitive files we’d rather other people not be able to access - http_auth and credentials.json. Not only would they be visible if the config is made public, since they’re in the Nix store, they’re actually visible for any user in the system, which we want to avoid as much as possible.
A great solution to this is agenix. It’s a secret management tool for NixOS, which encrypts files using age (think PGP, but for the 21st century!), and then decrypts them at runtime, allowing the files to be securely kept in the Nix store.
The best way (in my opinion) to install agenix is with Nix Flakes, but if you’re not using them, fetchTarball is fine:
{
  imports = [ "${builtins.fetchTarball "https://github.com/ryantm/agenix/archive/main.tar.gz"}/modules/age.nix" ];

  # ...
}
Whichever way you get the agenix module set up, it’s now time to encrypt the two files above. First, let’s create a secrets.nix file, containing our public keys:
# secrets/secrets.nix
let
  user = "ssh-ed25519 <...>";
  system = "ssh-ed25519 <...>";
in
{
  "credentials.json.age".publicKeys = [ user system ];
  "http_auth.age".publicKeys = [ user system ];
}
Replace the value of user with your user’s public key (it’s in ~/.ssh/id_ed25519.pub, or something similar), and the system key with the one on the target machine (get this using ssh-keyscan: ssh-keyscan [hostname] will return a list of public keys). Note that the system keys are not the user keys, but rather the ones that get stored in ~/.ssh/known_hosts!
With this out of the way, we can now encrypt our files with agenix:
$ cd secrets/
$ nix run github:ryantm/agenix -- -e credentials.json.age < ../credentials.json
$ nix run github:ryantm/agenix -- -e http_auth.age < ../http_auth
Our files are now encrypted! Let’s update our config to use them:
{
  # Define the file locations
  age.secrets.credentials.file = ./secrets/credentials.json.age;
  age.secrets.http_auth.file = ./secrets/http_auth.age;

  services.cloudflared.tunnels."[your tunnel uuid]".credentialsFile = age.secrets.credentials.path;
  services.nginx.virtualHosts."fava.[your domain]".locations."/".basicAuthFile = age.secrets.http_auth.path;

  # Everything else is the same!
}
We’re now done! Fava is accessible from anywhere, but all is secure!
About this blog…Hope this was useful! I’ve not written anything on this blog in… damn, 5 years! I have tons of articles I’ve drafted in the mean time, and I’ve finally gotten around to finishing one of them. Hopefully I can finish some more from now on :)